|
| HTC
CHT9000 --- The first custom-made 3G Smartphone made by HTC was
launched by Chung-Hwa Telecom Taiwan, is the best-seller model which
more than 10,000 units were shipped within 2 months as it launched. The
other family members are all in the same hardware specification as
CHT9000, they are HTC TyTN, HTC Hermes & Dopod 838 Pro.
Unfortunately, it(CHT9000) comes up a severe issue on its touch screen
with a high failure rate. My Dopod 838 Pro got same problem as well
right after 72 hours running. 這支號稱在國內兩個月之內銷售破萬的暢銷熱機 --- CHT9000, 是中華電信的第一支依照市場定位而客製化的智慧型手機, 囊括 WiFi、Bluetooth 等雙無線功能的 3G PDA手機,功能之強大 已堪稱為少數商務機等級當中上選之一,其同型的兄弟機種則有 HTC Hermes, HTC TyTN, 以及甫上市的 Dopod 838Pro, 均以同一硬體規格為基本架構,搭配不同外型、顏色、按鈕配置 以及不同語言等等行銷至世界各地,其擁有之市佔率理當不在少數。 HTC CHT9000 HTC TyTN Dopod 838 pro    HTC Hermes: (Picture linked from Engadget.com)  然而,在國內率先上市的 CHT9000,近來卻頻傳在觸控定位不準確的問題, 狀況嚴重時甚至無法點到右側的下拉bar,使用螢幕小鍵盤常常會點錯字, 手寫輸入時錯誤率也大增,但偶爾心情好時他又會暫時回復正常......  How to know if your device is in trouble??? 如何得知你的手機出了問題? 1. 進入「記事」編輯模式,以觸控筆自右上畫直線至左下方, 畫線過程請全程注意筆尖與產生線條的差距程度, 本問題點多數發生在螢幕的右側,越往右側外框邊緣移動, 可能產生的差距也就越大。 Start a new "Notes" on your CHT9000 by drawing a straight line from upper left corner to lower right, monitor the gap between the end of the straight line and the location where the stylus tip stops. 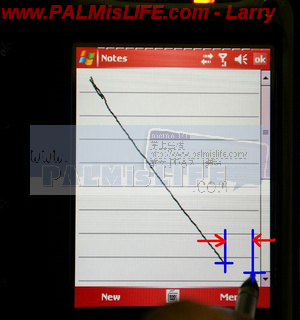 2. 以下範例為「行事曆」的編輯畫面,利用筆尖在螢幕右下方長時間壓按使其跳出小型選單, 在選單蹦出之前會出現一個小圓圈,請注意觀察筆尖壓按處與此小圓圈圓心處的差距。 Or you can tap-and-hold at the lower right corner of the screen in any other editing mode and measure the distance between pen tip and the central location where the circle pop-up before a sub-menu shows. 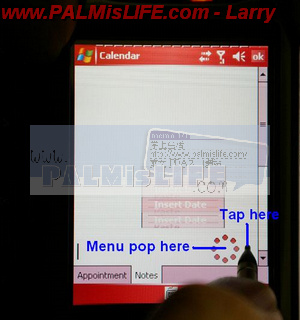 3. 當觸控偏移發生以下狀況時,即使點選螢幕右側外框邊緣, 仍無法操作最右側的上下翻頁拉桿。 You won't be able to reach the scroll bar at the right side when touch panel got offset as serious as the picture shown below. 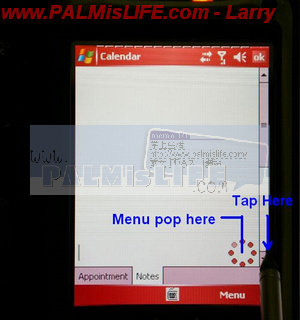 在日本網站已經有實際的拆機經驗可參考,並且已有解決該觸控不準的方式,參考網址請按此: A Japanese site has announced the CHT9000 hardware issue and solutions prior to my writing, see link below: http://inuchanbt.blog54.fc2.com/blog-entry-99.html 底下圖文為 Larry 親自實作之紀錄,提供各位參考。 請注意: 問題點解決方法: Steps to eliminate touch screen issue: A. 拆解電池背蓋,取下SD卡、SIM卡、電池本體後,卸下後方外殼,拆解機板並鬆開LCD固定螺絲。 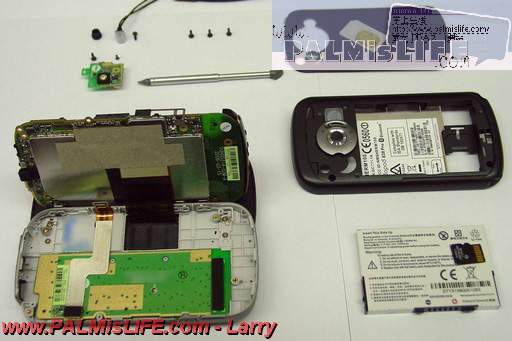 B. 拆解螢幕部分時須注意與之連結的軟排線。 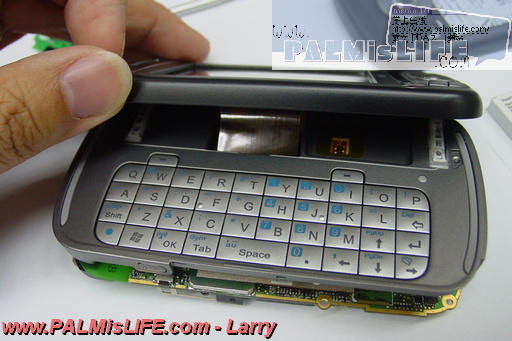 C. 圖片為LCD部分,問題肇因於螢幕前方外殼內部的海綿襯條,壓迫到觸控螢幕的範圍。 Here it is!!! As the red line shows at the right side of the touch screen, where there was a pressure applied from a sponge strip under the front cover(casing) and made that issue resulted. Idealy, for a LCM (a module combined with LCD and touch panel glass top), the "Touchable" area should equal to the "Viewable" area.( or the "touchable" area can be a little bit wider, it would be acceptable) In this case, the "Touchable" area is much wider so that the front casing may often apply a pressure to touch panel via the sponge strip under the front cover(casing). 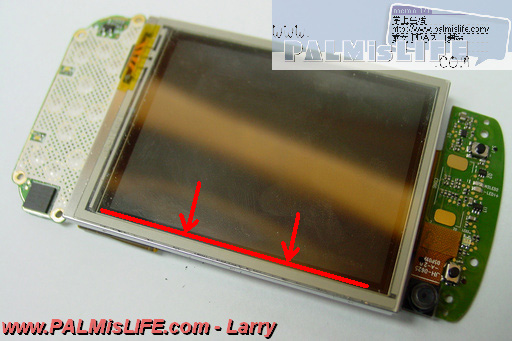 D. 撕下前殼右側內部(翻轉後為左側)之海綿襯條。 Remove the sponge strip from the front cover. (Shown as the picture below) PS. A sponge strip applied here as a spacer right between the LCM and front cover. 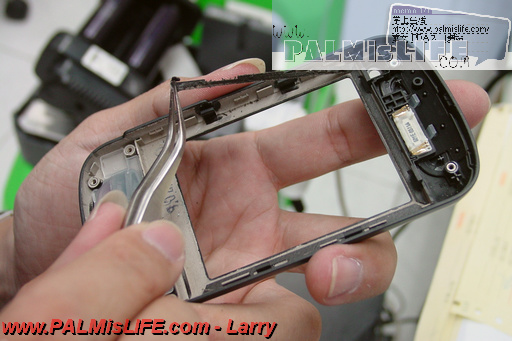 E. 取下海綿襯條後並清潔完成的外殼內部。 When done, assemble all parts and casing. 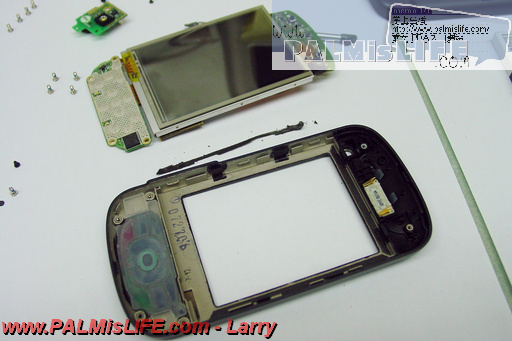 F. 組裝回復所有零件以及外殼裝配,建議重新開機後進行一次筆觸定位。 本機原本觸控偏移的頻率甚高,每天需要校正5-6次,自此次處理完成後 至今(已經兩天)未曾在出現過偏移現象,操作精準度均在控制之內。 It is recommended to perform "Screen alignment" once right after restart the device. For my Dopod 838 pro, I used to perform screen alignment more than 5 times a day. Now I am happy on tapping anything accurately after reworking...  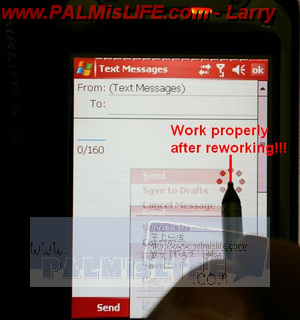 以上所有圖文均為本站原創,如有轉載引用之需求,煩請來函聯繫告知。 - by Larry |
GMT+8, 2025-7-3 15:00 , Processed in 0.017733 second(s), 18 queries , Gzip On.
Powered by Discuz!
© 2001-2012 Comsenz Inc. style by eisdl